

Today I will give you a brief intro on how to do your own food photography at home. You need an entry level DSLR, a tripod, a remote shutter release to minimize camera shake, preferably a polarizing filter, and a couple of white foam cards. I am using a 50mm f1.8 lens in the demo. More info on this in my last blog entry.
For lighting, set yourself up next to a window. Cloudy days are best, as they provide soft, even lighting. Direct sun is quite harsh, but if that is what you have, then I suggest you look into covering the window with a sheer curtain or sheet of some sort, and that will give you softer light. Shower curtain, parchment paper, anything sheer that doesn’t have a colour cast will do. Now get some food to photograph and make your set up. We want the window light to be coming from the side and/or behind the food. This will give us shadows falling sideways and forward, providing dimension to the food. As well, having the window light on the side and behind the food gives a natural feeling of what it really is like to eat that food - imagine yourself sitting by the window in a quaint summer home in the middle of the forest, eating your croissant, sipping your coffee, and looking at the gorgeous day outside - light hitting your face. The food is then in between the window and your face, and your face will now be where the camera stands.

Set up next to a window, and keep the window beside or behind the food. I am using a cardboard presentation board for a background here, and a white foam card positioned opposite the window light, in order to reflect some of that light back into the food set up. Note that the white background also bounces some light back into the food.
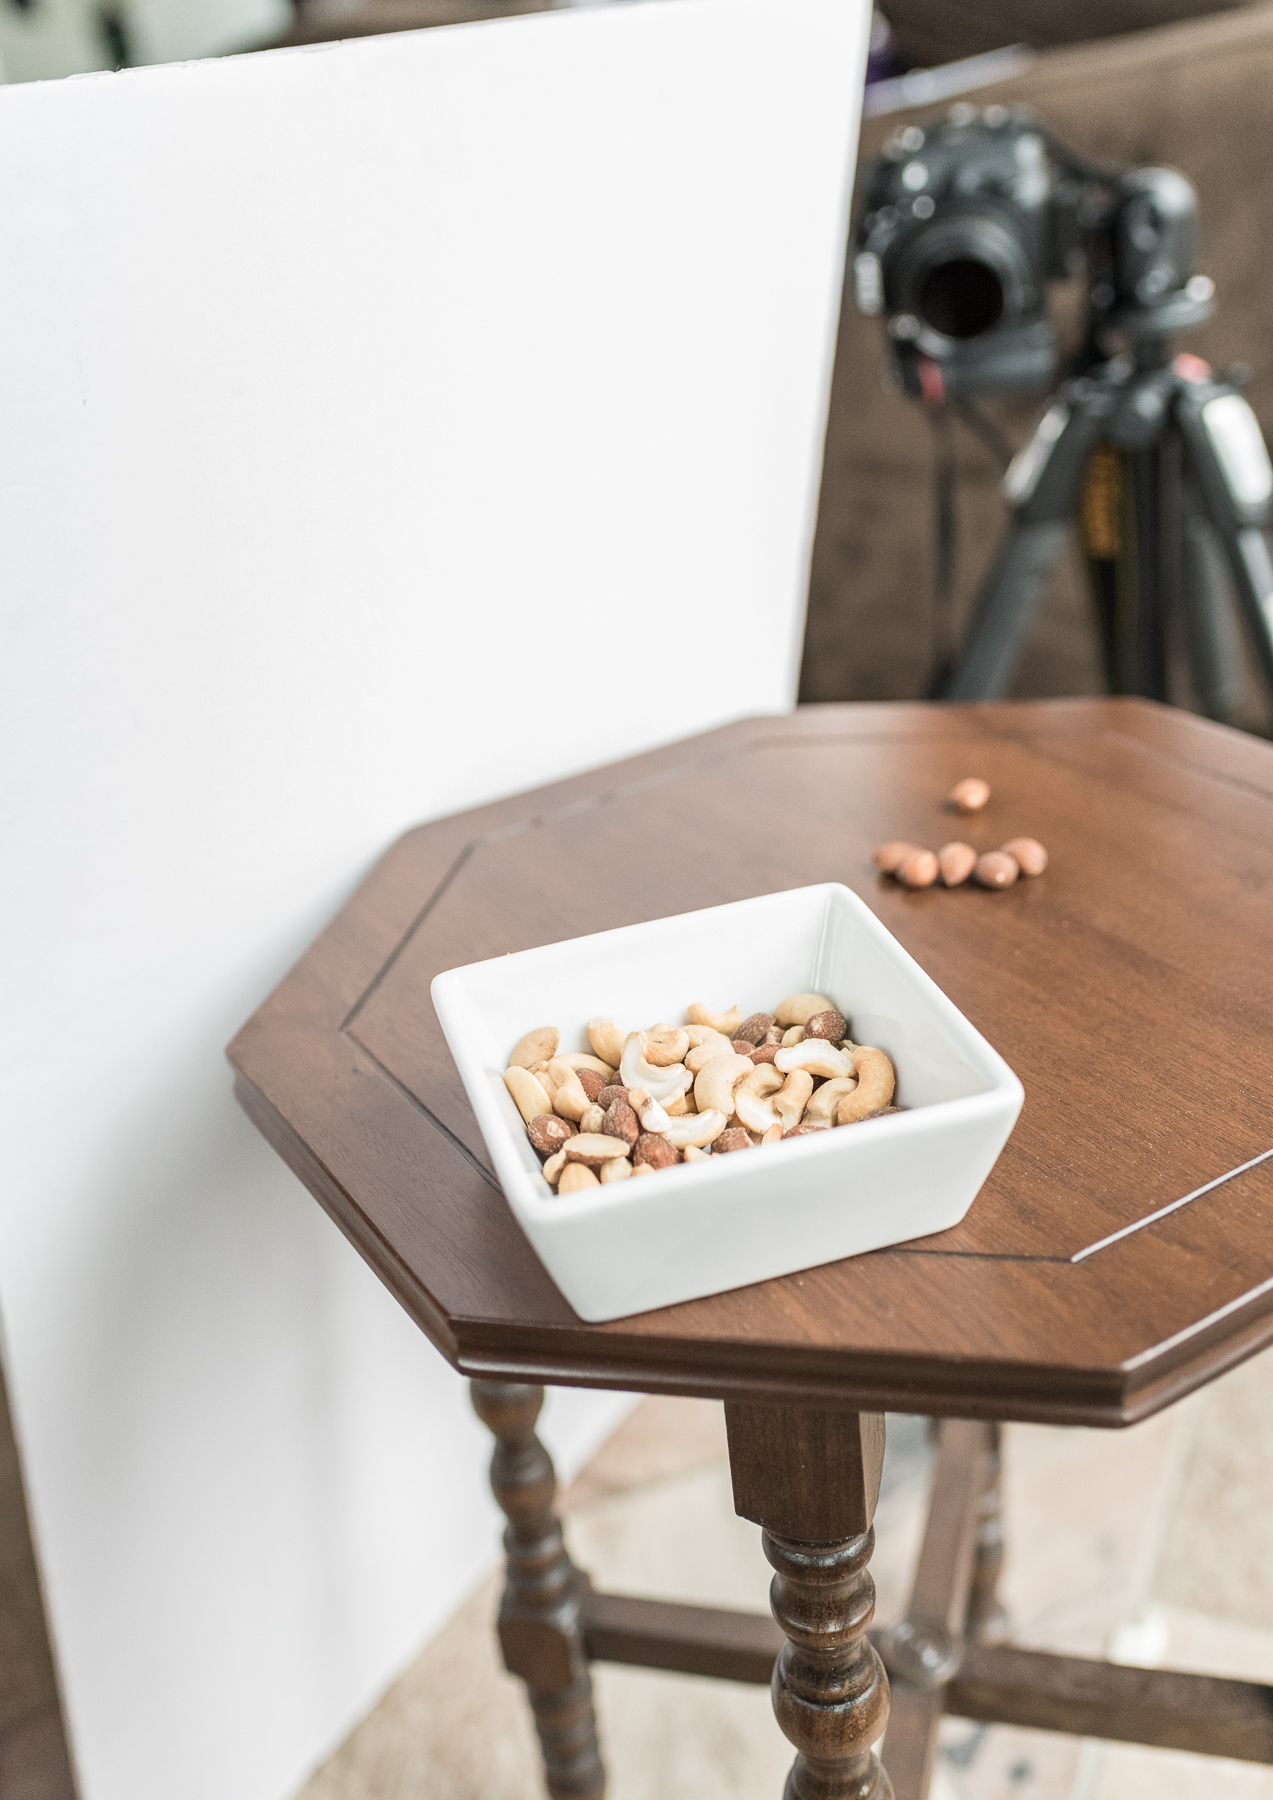
White foam card placed as close as possible, roughly opposite the window light.
We will keep the lighting simple - it really does not need to be complicated. All you need is one or two white foam cards, which the dollar store has in the poster section. All we will do is play beside the window with our food placement, camera angle, and a white card to bounce some of the light coming in back into the shadows, to soften them. Position the white card as close to the food as you can without cutting into the picture frame, roughly opposite the window light. If you are shooting with the window directly behind the food, you can position two cards on either side of the food. You can move it around a bit - a bit more in front of the food, a bit more to the side of the food. Pull the white card off completely to see the difference in the shadow. Experimentation is key here - I am purposely not showing you much variation, because it is important that you develop your own ‘feel’ for how to control the light with the white cards.

The effect of adding a white card, or 'fill' to fill the shadows. High contrast in the first photo can be a bit distracting. In the second photo, the right-hand side of the serving dish is lighter, and its shadow is lighter. As well, the left inner side of the dish is more evenly lit.
So far, we have a window, and a white card set up opposite the window, to bounce some light back into the shadow areas created by your food set up. Now we add one more tool for light control - a polarizing filter. It cuts light reflections which are bouncing directly into your lens. When you have lots of shiny things - glass, metal utensils, or even a very smooth wood surface such as what I was using - some of the light hits the object and bounces directly into your lens, creating a specular highlight. There is nothing wrong with that. However, having some way of controlling these specular highlights can help you cut them down in situations where there are too many, making the photograph a bit of a mess. Moving the camera, repositioning the set up with respect to the window light, and using the polarizing filter all can have an effect.

A polarizing filter is added to cut down on the reflection from the smooth table top. In other cases, the filter can help cut down reflections from shiny utensils and glass. Once again, experiment with it.
Finally, play with your depth of field. If you have a pattern that you have placed in the background, feel free to move it closer or farther away from the food set up (and hence, camera), to help make it less or more blurry. Play with your aperture setting. Make sure your focal point makes sense - it doesn’t necessarily have to be the closest item to the camera, but it should be something that carries great importance in your photo - the star of the show. As a starting point, I would use a narrower aperature, f8, as open as f5.6. f4 is probably the widest I would personally shoot at, but this is subjective and again, experiment to see what you like.

Choose your aperture. If you are having trouble blurring your background, move it farther away from the camera if possible.
In all, I am encouraging you to experiment so that you can develop a sense of light, and gain confidence in controlling the light using the white card and polarizing filter. If you find some food photographs on the internet which you want to use as inspiration, look at the shadows. Which way are they falling? Can you then extrapolate the position of the main light? Can you try and emulate the photo using natural light? Play, and let me know if you get stuck. Show me your set up, and I can point out what your issue might be. And remember, we are keeping it simple using natural light. Food photography professionals can spend 10 hours working really hard with studio lights and/or natural light to create one stellar photograph.
A note on styling: there are specialists whose entire job is food and prop styling. Do your best! I purposely chose to not focus on styling in my examples, as I really want you to develop a feel for the light first. Here are some tricks on styling:
If you are going to have a fizzy drink in your photo, take your time with the set up, lighting, and framing of your shot, and add the fizz at the very end. This could mean you do your test shots with an empty glass or a glass that you only fill last minute.
Fresh fruit/veg.: Keep those in the fridge, covered with a wet paper towel until you are ready. Then, carefully place the pieces in your set up. If you notice they are looking a little dull and gloomy, carefully pick them up and carry them away from the set, and lightly mist with water using a spray bottle.
Camera angles: Play with them. Straight down, or straight on, and anything in between. Never go through the effort of painstakingly setting up a styled food shoot and then tear it down before you’ve tried at least 3 vastly different camera angles. Get really close. Cut off some of the plate in your shot. Shoot vertical. Actually, shooting vertical is awesome because you can leave room at the top for text, and it works better with Pintrest.
Lighting: if you are shooting natural light, turn off all the other lights in the room to avoid mixed lighting issues. The colour of daylight is rather blue, where as the colour of your incandescent bulbs is more yellow-orange. That’s an issue.
Careful carelessness: Notice in professional food photography, sometimes it looks like they’ve randomly thrown some berries or nuts on the side of, say, a cheese plate. I assure you, great care was taken as to where those ‘random’ berries fall, and how they face the camera. They shouldn't look all arranged unnaturally, but be mindful of whether they are distracting the eye away from the main event, or adding accents of colour/pattern in just the right amount in the overall photo composition.
Colour theory: Think about which colours go together well, and try not to have too many competing in your shot. Different colour palettes also support different moods, so colour selection is a major component in art composition.
In conclusion, set up with a window beside or behind the food. Position a white card opposite the window or beside the food to bounce light back into the shadows. Now tweak everything - experiment until you are happy. Ask me if you get stuck!